Search This Blog

Showing posts with label kids. Show all posts

Monday, May 30, 2016

Fifteen Minute Dragon Bookmark

Hello friends! It's Jes today.  If you didn't know, Kris and I are co-admins for the Sweet Stamp Shop Fan Club on Facebook. We recently started a book club for our members, and we're reading the Harry Potter series together.  Everyone is making adorable bookmarks, and I was inspired to make a set of my own.
I started out by watercoloring a sheet of Canson Watercolor paper. I taped it down to my desk to minimize warping so I could get it good and wet.  I used a few distress inks that I had on hand.  Then once it dried, (I was impatient and heat set it with my heat tool) I stamped out a few Dragons from one of my favorite sets from Sweet Stamp Shop. I used Memento Ink in Tuxedo Black, because I wasn't sure if I was going to water color the dragons, and Memento doesn't bleed.

Once I had them all stamped out I used a T-Square Ruler and a fine tipped Sharpie to draw in the shape of my bookmarks. I liked how it looked right under the wings best, but when I do this again, I'll bring the lines out to the tips of the wings. I think that will make cutting and popping the image to clip in the books easier, and more attractive. 
Next, I tried to be all fancy and cut the whole thing out with my Gyro-Cut tool. Don't do this. It takes forever with this paper. Cut it all out with scissors and then you can use the gyro for the detail cutting later on. 
I chose to color them after they were cut out, you can color before or after, it doesn't make any difference.  Isn't he so cute? I colored him in with a couple of Tombow markers, but you could use any coloring medium. I also outlined the whole thing with black markers just to give a clean edge.  *Note, the backside looks pretty gnarly, but by adding the long rectangle on the bottom it makes these easy to line up, so you could have the dragon dude on the front and the back.  I'm going to play around with it a bit, and I might update this later if I come up with an idea I like.
Here is the hard part.  To make the little dragon hold your page like this, you have to cut in pretty close.  I used my gyro for this, and then cut all the way up to his shoulder and his neck to give him as much room as possible to hook on the page.

I used the tip of the gyro tool to push the arms out after cutting them, and then bent them back a bit so that they would stay popped out and I wouldn't have to do it again every time I wanted to mark a page.


His arms are very tiny and he doesn't hold the page well when he was cut like this, so I experimented really quick and decided to cut out his body. This works well, but the tail was so close to the edge of the frame that I nearly cut through it, and it's still very fragile. I mentioned above that it might be a good idea to have the frame for the bookmark start at the tips of the dragon's wings. This is why. It would give room to cut around the tail without risking the integrity of the bookmark.
Both look adorable, and I'll definitely use both. Just play around a bit and see what you like best.  They will also work well as regular bookmarks. 
If you liked these let me know in the comments. We're also taking requests for projects.  If you have something you'd like to learn to do, let us know in the comment section and we'll do our very best to post a tutorial soon.  Also, don't forget to follow us on IG: @teachplancraft and @jes_planning.  Drop us a comment and let us know you're coming from the blog! Thanks for reading! 


Sunday, May 15, 2016

15 Minute Summer Activity Sticks

Hi everyone, it's Jes again. I'm back with another 15 minute (ish) craft. Have you ever heard "I'm bored! There's nothing to do around here!" from your kids over the summers? I remember annoying my mom with it constantly. My daughter is getting to that age, and I decided to head off the boredom with some pre-determined activities we can do together. I considered just writing it in my planner and choosing something for each day, but that wouldn't be much fun for her.  Then, at a recent wedding, the couple put popsicle sticks out on the tables and asked people to write down date ideas.  It was perfect for what I needed, and I stopped by the craft store on the way home to grab some sticks for myself.

What you'll need:
     Popsicle sticks (tip: get the colored ones, they're more fun)
     Markers (tip: sharpies bleed really bad, so test your makers before using them)
     VersaCraft Ink 
     Stamps that go with what you want to write. 

The next part is super simple.  Write your activity on the stick, choose a coordinating stamp, and stamp it on the top of your stick. You will want to let the ink from your stamping dry for a few minutes before coloring or it will smear.  I had the most success with the ones that sat about five minutes.  

As always, at the end of the project, there are a few things I wish I would have done differently.  I think it would have looked really pretty to write a bit bigger, and fill the stick, maybe even add a bit of fancy lettering. I definitely wish I would have found a marker that didn't bleed.  I also wish I would have tried my spectrum noir markers out on it for the coloring. Using the colored sticks instead of the plain ones would be more fun, but then coloring might not look right.

I've included a short how-to video below.  If you like it, be sure to hit like and subscribe.  If you do this craft, be sure to tag me on Instagram @jes_planning and let me know. :)


Sunday, March 6, 2016

Hey everyone! It's Jes. This has been a crazy week! I tried a couple times to put together a Plan With Me video and it just was not working the way I wanted. So instead, I decided to put together a simple little card using the new Adventure Awaits stamp set from Sweet Stamp Shop.  Isn't it just the cutest set?

I wanted something super simple, that I could do in bulk (I ended up making five just like this.) Now that my daughter is in school, she receives invitations to birthday parties fairly often and it's nice to have a few cards on hand to send with the gift she chooses. Start with a simple card base. I used some pre-made cards from Michaels (that I cannot find the link to anywhere :/), and some white card stock for the little Adventure critters. I also used the Happy Birthday set, also from Sweet Stamp Shop, to add the sentiments. I stamped out several sets of Happy Birthday and the critters.


Up next was coloring my little animals.  I love Tombow markers. I own all but six from their collection.  They are my go to coloring tool.  I had so much fun coloring the little animals, too!


I have to admit, my favorite part of this project was using my new Gyro-Cut Tool to kiss cut the animals.  It took me about a minute to cut out each little one, and you can see how clean it cuts.  I always hated fussy cutting, there were times I didn't want to do a craft because I knew I'd have to cut out the shapes and stamped images.  This tool changed my crafting.  What would take several minutes to fussy cut takes a minute or less now.  I can do twice as many crafts, now. If you don't have it, I highly recommend buying it!


Finally, I glued my critters in place. The card looked just a bit bare, so I added in a couple of the cute sentiments that came with the stamp set. It added the perfect final touch. From start to finish this card took 17 minutes to complete. I love fast craft projects.  Don't you?


Supply List:
     Stamps - Sweet Stamp Shop
                        Happy Birthday
                        Adventure Awaits
     Ink - Versafine Onyx Black
     Cutter - Gyro-Cut
     Acrylic Block - Round Acrylic Block
     Glue - Mono Multi Liquid Glue
     Cards - Pre-made set that I found at Michaels


Wednesday, February 24, 2016

Happy Wednesday, everyone!  It's Kristine back with you today, and I have a quick, easy, CUTE solution to a birthday party problem!

Last week, my dear friend's son turned 6 years old, and she was having a birthday party for him.  The budget was tight, but my friend wanted to give all the children a fun, personal favor to remember the party by.  We were trying to come up with possible ideas, but nothing would work for her.  I was thinking about all my card-making and planner stamps, wondering if I could make something with them instead of buying something.  And then inspiration struck!

I have been using these do-it-yourself buttons at Michaels for a couple of years now - I'm an 8th grade math teacher and I make buttons for the kids who score 100 on tests to wear around school:


I had just given a bunch of buttons out a couple of days before, since we'd just had our unit 5 test, so I had these buttons on the brain.  And I realized that I could use my stamps to create fun buttons for my friend's son's birthday party!

Here is what the package of buttons looks like when you buy it.  I found them in the children's crafts section of Michaels, and they were $4.99 for the package of 12.  Not a bad deal!


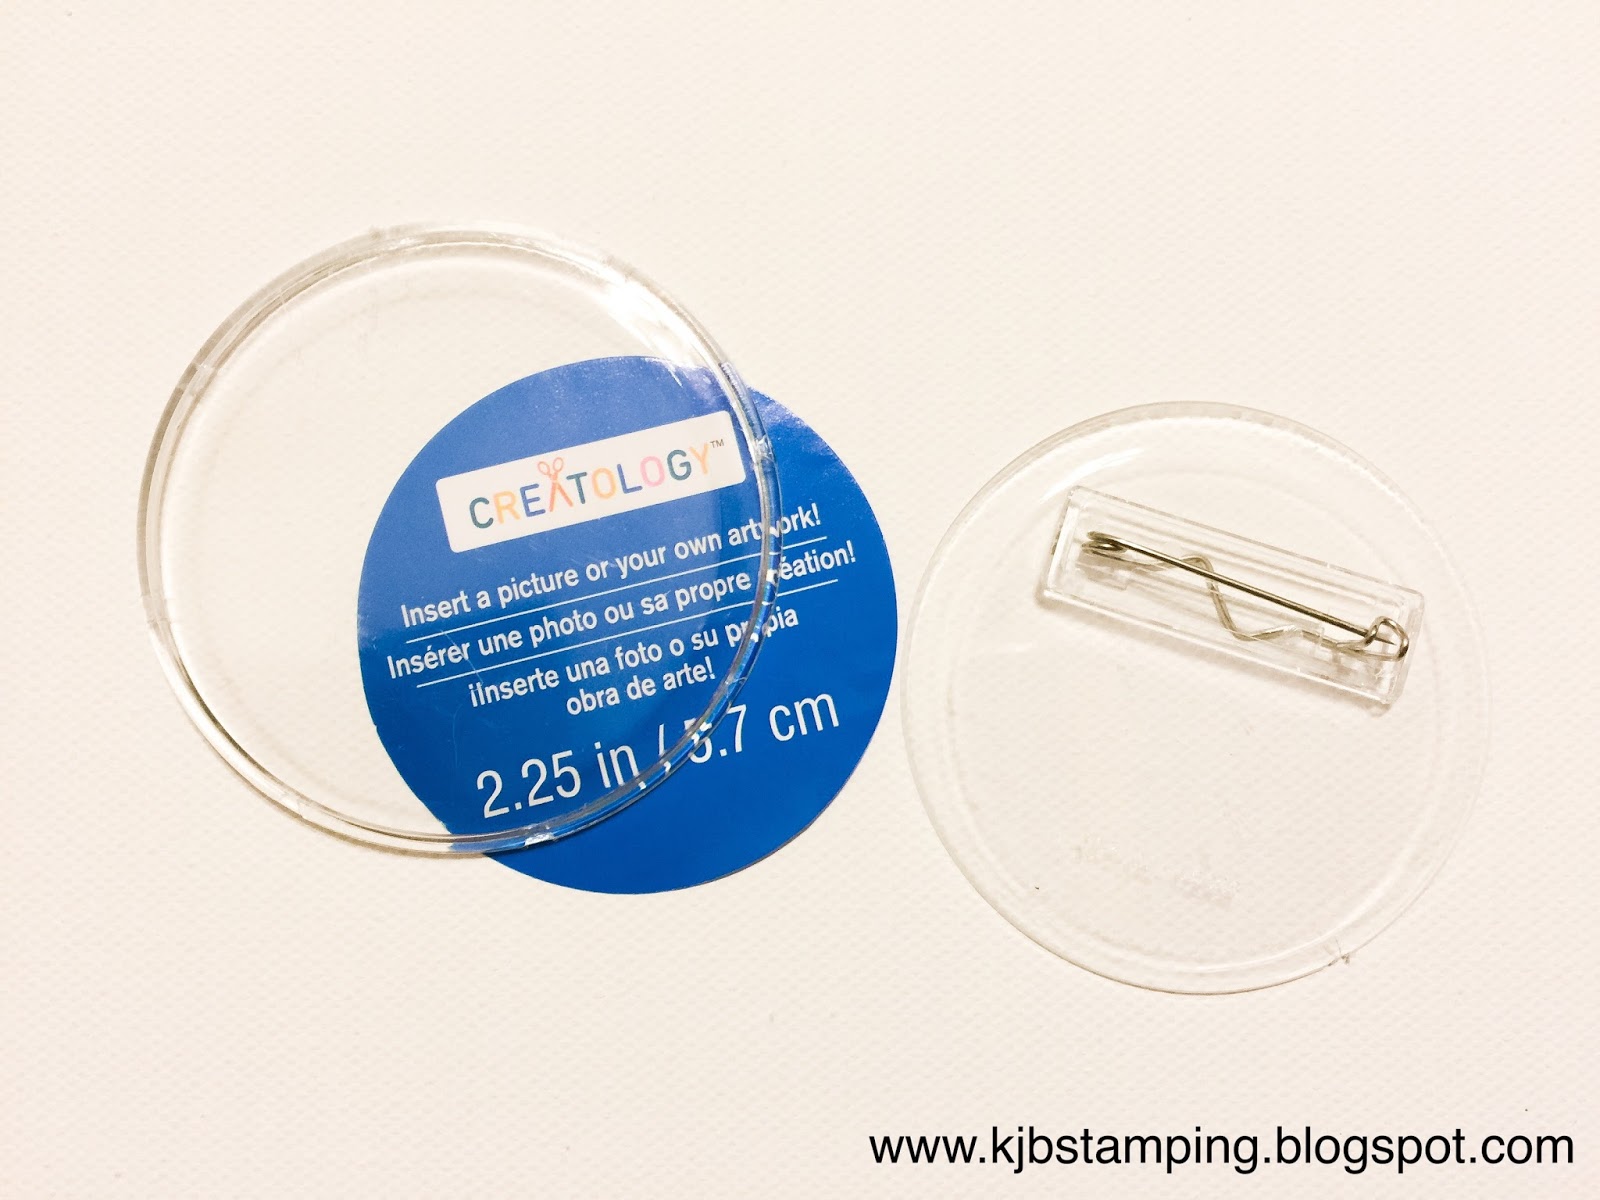
The backs of the buttons pop off the front fairly easily, though you do have to be careful not to crack them.  The first thing I did was pop off all the backs and remove the paper inserts.


The inserts are not quite big enough to completely fill the buttons; if you look at the photo of the buttons still in the packaging, you can see a bit of clear space around each blue insert.  So I used a compass to draw a circle that's slightly smaller than 2.25" in diameter on an index card and cut that out to make my template.  Then I used that to trace 12 circles on smooth white cardstock (I have also found that plain paper works just as well - budget win!) and chose images to stamp on each circle. (This party did not have a theme, so I chose generic images all from Sweet Stamp Shop so that the images would all have the same general style and feel. You could certainly use any stamps you have, mixing and matching to create a set that works for your party theme, if you have one.) Since the kids going to the party were fairly young, I decided to go with a few large images on each button and stamped them in black ink.  I purposely did not add any sentiments to the buttons.


Once the buttons were stamped, it was quick and easy to cut them out, put them in the buttons, and pop the backs on.  I left them black and white on purpose; one of the activities my friend planned for the party was for the kids to each choose a button and color it themselves.  Then they'd truly have a personal party favor to take home and wear!


I decided to also make her son a "birthday boy" button that he could wear for the whole party to make him feel extra special on his big day.  Are these not completely adorable?


This project cost only $0.42 per child, since I already had all the stamps and ink on hand.  You can't beat that for a budget project that's unique and totally cute!  And really, the possibilities are endless for these buttons. Let your imagination fly!

Thank you so much for stopping by and visiting today!  We'd love your feedback on this post, so please feel free to comment below.  And if you decide to make your own stamped buttons, tag us on Instagram (@teachplancraft, @jes_planning) so we can see your awesome creations. Have a great day!

Stamp sources:  All stamps from Sweet Stamp Shop: