Search This Blog

Showing posts with label birthday. Show all posts

Sunday, March 6, 2016

Hey everyone! It's Jes. This has been a crazy week! I tried a couple times to put together a Plan With Me video and it just was not working the way I wanted. So instead, I decided to put together a simple little card using the new Adventure Awaits stamp set from Sweet Stamp Shop.  Isn't it just the cutest set?

I wanted something super simple, that I could do in bulk (I ended up making five just like this.) Now that my daughter is in school, she receives invitations to birthday parties fairly often and it's nice to have a few cards on hand to send with the gift she chooses. Start with a simple card base. I used some pre-made cards from Michaels (that I cannot find the link to anywhere :/), and some white card stock for the little Adventure critters. I also used the Happy Birthday set, also from Sweet Stamp Shop, to add the sentiments. I stamped out several sets of Happy Birthday and the critters.


Up next was coloring my little animals.  I love Tombow markers. I own all but six from their collection.  They are my go to coloring tool.  I had so much fun coloring the little animals, too!


I have to admit, my favorite part of this project was using my new Gyro-Cut Tool to kiss cut the animals.  It took me about a minute to cut out each little one, and you can see how clean it cuts.  I always hated fussy cutting, there were times I didn't want to do a craft because I knew I'd have to cut out the shapes and stamped images.  This tool changed my crafting.  What would take several minutes to fussy cut takes a minute or less now.  I can do twice as many crafts, now. If you don't have it, I highly recommend buying it!


Finally, I glued my critters in place. The card looked just a bit bare, so I added in a couple of the cute sentiments that came with the stamp set. It added the perfect final touch. From start to finish this card took 17 minutes to complete. I love fast craft projects.  Don't you?


Supply List:
     Stamps - Sweet Stamp Shop
                        Happy Birthday
                        Adventure Awaits
     Ink - Versafine Onyx Black
     Cutter - Gyro-Cut
     Acrylic Block - Round Acrylic Block
     Glue - Mono Multi Liquid Glue
     Cards - Pre-made set that I found at Michaels


Wednesday, February 24, 2016

Happy Wednesday, everyone!  It's Kristine back with you today, and I have a quick, easy, CUTE solution to a birthday party problem!

Last week, my dear friend's son turned 6 years old, and she was having a birthday party for him.  The budget was tight, but my friend wanted to give all the children a fun, personal favor to remember the party by.  We were trying to come up with possible ideas, but nothing would work for her.  I was thinking about all my card-making and planner stamps, wondering if I could make something with them instead of buying something.  And then inspiration struck!

I have been using these do-it-yourself buttons at Michaels for a couple of years now - I'm an 8th grade math teacher and I make buttons for the kids who score 100 on tests to wear around school:


I had just given a bunch of buttons out a couple of days before, since we'd just had our unit 5 test, so I had these buttons on the brain.  And I realized that I could use my stamps to create fun buttons for my friend's son's birthday party!

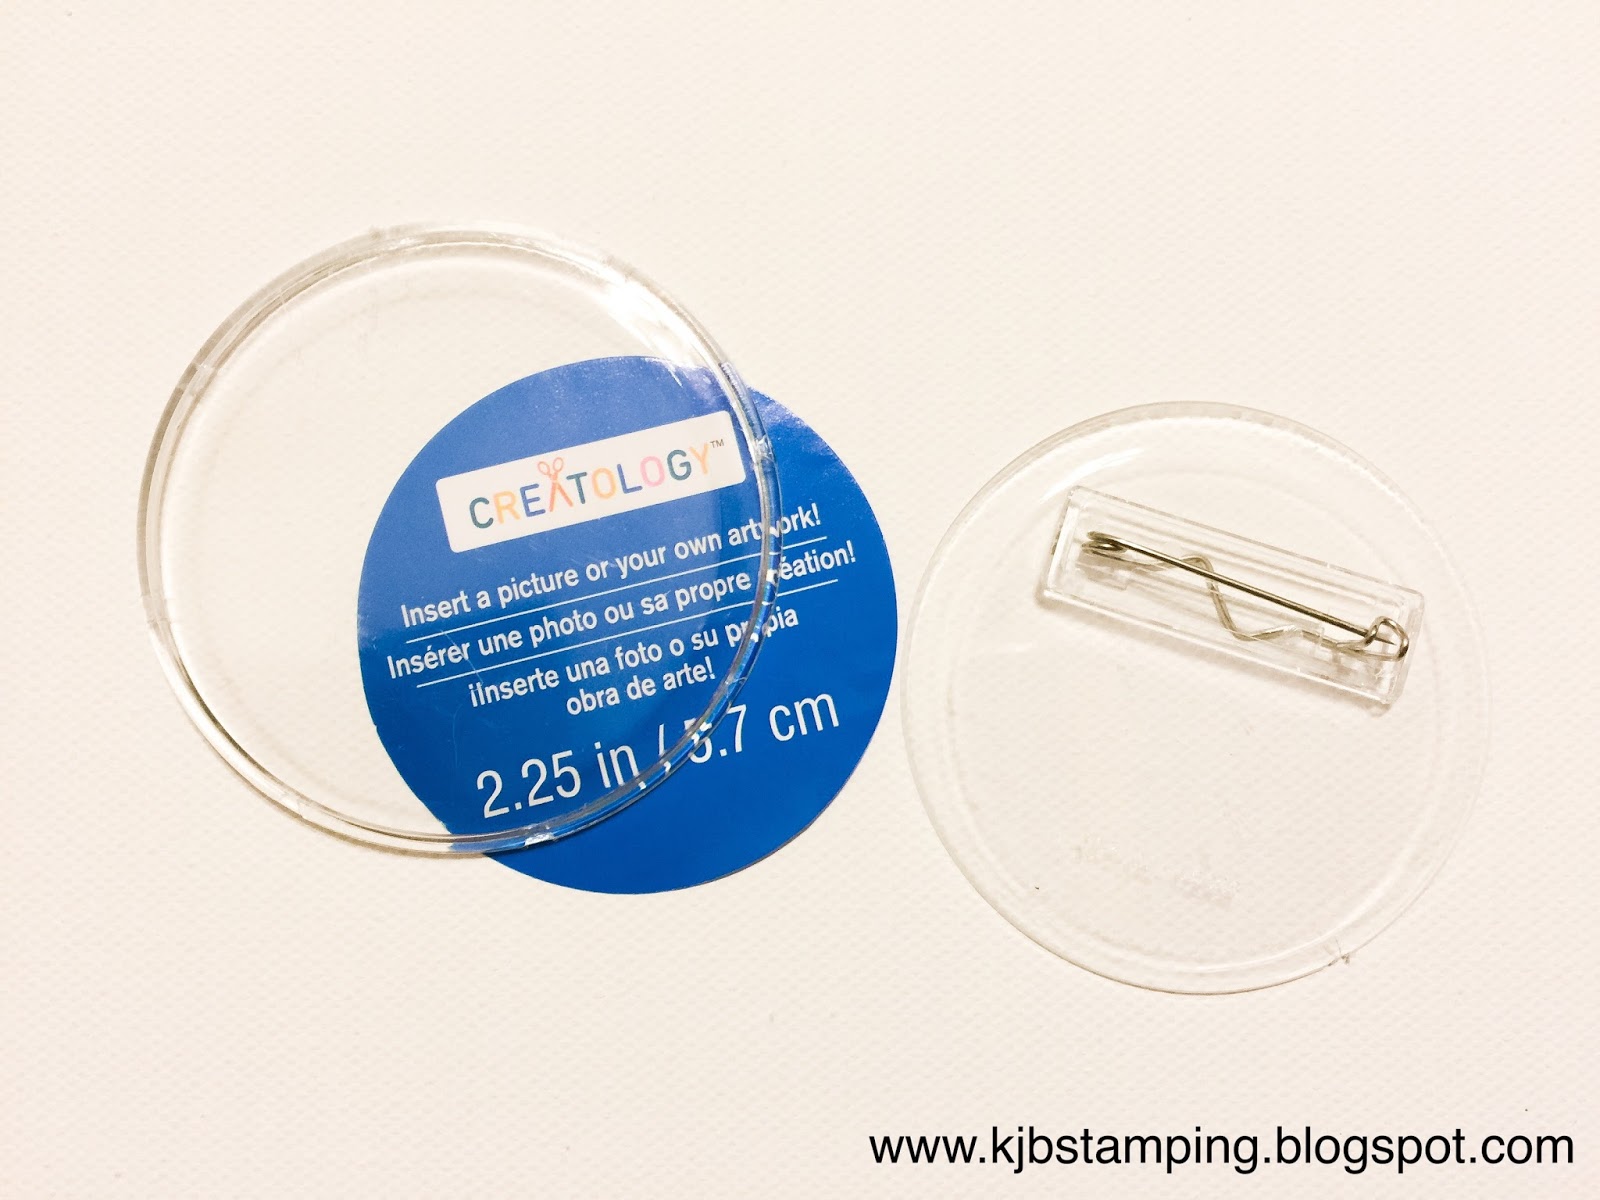
Here is what the package of buttons looks like when you buy it.  I found them in the children's crafts section of Michaels, and they were $4.99 for the package of 12.  Not a bad deal!


The backs of the buttons pop off the front fairly easily, though you do have to be careful not to crack them.  The first thing I did was pop off all the backs and remove the paper inserts.


The inserts are not quite big enough to completely fill the buttons; if you look at the photo of the buttons still in the packaging, you can see a bit of clear space around each blue insert.  So I used a compass to draw a circle that's slightly smaller than 2.25" in diameter on an index card and cut that out to make my template.  Then I used that to trace 12 circles on smooth white cardstock (I have also found that plain paper works just as well - budget win!) and chose images to stamp on each circle. (This party did not have a theme, so I chose generic images all from Sweet Stamp Shop so that the images would all have the same general style and feel. You could certainly use any stamps you have, mixing and matching to create a set that works for your party theme, if you have one.) Since the kids going to the party were fairly young, I decided to go with a few large images on each button and stamped them in black ink.  I purposely did not add any sentiments to the buttons.


Once the buttons were stamped, it was quick and easy to cut them out, put them in the buttons, and pop the backs on.  I left them black and white on purpose; one of the activities my friend planned for the party was for the kids to each choose a button and color it themselves.  Then they'd truly have a personal party favor to take home and wear!


I decided to also make her son a "birthday boy" button that he could wear for the whole party to make him feel extra special on his big day.  Are these not completely adorable?


This project cost only $0.42 per child, since I already had all the stamps and ink on hand.  You can't beat that for a budget project that's unique and totally cute!  And really, the possibilities are endless for these buttons. Let your imagination fly!

Thank you so much for stopping by and visiting today!  We'd love your feedback on this post, so please feel free to comment below.  And if you decide to make your own stamped buttons, tag us on Instagram (@teachplancraft, @jes_planning) so we can see your awesome creations. Have a great day!

Stamp sources:  All stamps from Sweet Stamp Shop:

Wednesday, February 17, 2016

Hi everyone! Jes here, with a quick little birthday card tutorial. I used the Super Boy, and the Happy Birthday stamps sets from Sweet Stamp Shop to create this cute little card for my husband's birthday.

I knew when I started that I wanted to have the little super hero on a background of stars or clouds.  While flipping through my rather embarrassingly large collection of paper I found this lovely starry paper from Lawn Fawn. It was perfect.  

I used a blank card from Michaels that I've had in my stash for a while. I measured an inch from the top and two inches from each side and used my paper trimmer to cut out my rectangle fairly quickly. After a few practice runs with a blank sheet of paper it was pretty easy to cut out my shape. 


I then cut a matching piece from my star paper, but just a bit bigger so that it could be glued to the inside of my card. 

After attaching the starry background to the inside of my card, I used the Happy Birthday stamp set and some white card stock to create the little banner sentiment, and glued that in place as well. 

After stamping out my little super hero with Lawn Fawn Black Licorice Ink, I fussy cut him out and used my Tombow Dual Brush Markers to color him in.  


My final step was securing him in place with a few foam dots to add a pop of dimension. 

All in all, discounting time to take photos the card took about twenty minutes start to finish.


Supplies Used.

Paper- Lawn Fawn Beachside Collection and a card base from Michaels
Ink - Lawn Fawn Black Licorice 
Markers - Tombow Dual Brush Pens
Stamps - Happy Birthday and Super Boy from Sweet Stamp Shop
Acrylic Block - Sweet Stamp Shop Round Block
Paper Trimmer - Fiskars 12 IN Paper Trimmer (Not the one I have, but this one is better)